What you will learn
You will learn:
- to configure your gradle with our nexus server and our SDK
- to configure the SDK in your application
Prerequisites - What you need to get started
- A Nexus Account: The SDK is available through a private Nexus. You must have received an email inviting you to create your account on our Gitlab server
- Your SDK user information: To initialize the SDK, you should have received a Login, a Password and a Company name.
- A BLE beacon: A configured beacon on your account is mandatory to test the application
- An Android Device: You need a compatible Bluetooth Low Energy Android device that is able to detect beacons
- The Android Studio application: Android Studio must be downloaded from the Android Developpers’ website
Step 1: Configure your access to our Nexus from Gradle
-
Create a .gradle folder at the root of your home directory (if one does not exist already)
- be careful to NOT create it at the root of the project directory
-
Create a gradle.properties file inside the .gradle folder
-
Add the following parameters to the gradle.properties:
- forgeMavenUser=The email associated to your Connecthings Gitlab account
- forgeMavenPassword=The password associated to your Connecthings Gitlab account
-
If you don't remember your password, you can reset it here.
-
You can change the name of the parameters, but be sure to update them as well inside cBeacon’s build.grade file.
Step 2: Clone the sdk-tutorial repository
- Clone the sdk-tutorial repository
git clone https://github.com/Connecthings/sdk-tutorial.git
- Open the android>beacon>1-QuickStart>QuickStart-starter folder from the cloned sdk-tutorial folder
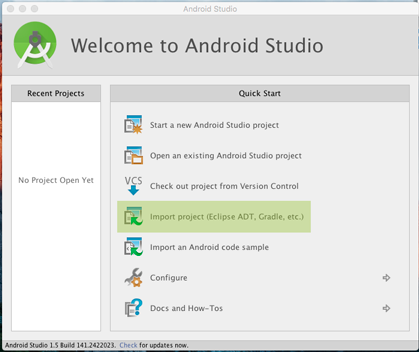
Step 3: Launch QuickStart in Android Studio
-
Launch Android Studio
-
Check that your Android SDK is up-to-date.
-
Click on "Tools > Android > SDK Manager”
- Inside the SDK Platform tab, check that Android 6 has been correctly installed
- Inside the SDK Tools tab, check that the Android Tools, the Android Support Library, and the various Google Services have all been correctly installed
-
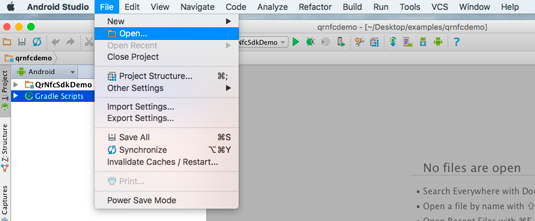
In the Android Studio Wizzard, click on import project.
-
Or, if you already are inside an Android Studio project, go to "File > Open"
-
Select the android>beacon>1-QuickStart>Starter folder from the cloned sdk-tutorial folder
Step 4: Configure the project from Gradle with our nexus
- Inside the Gradle section, open the project build.gradle file (the one named build.gradle(Project: Starter))
- Add to to the section allprojects > repositories
    maven {
         credentials {
             username = forgeMavenUser
             password = forgeMavenPassword
         }
         url "https://forge.adtag.eu/nexus/content/groups/public"
     }
     maven {
         credentials {
             username = forgeMavenUser
             password = forgeMavenPassword
         }
         url "https://forge.adtag.eu/nexus/content/repositories/releases"
     }
     maven {
         credentials {
             username = forgeMavenUser
             password = forgeMavenPassword
         }
         url "https://forge.adtag.eu/nexus/content/repositories/snapshots"
     }
Note:
if you have named differently forgeMavenUser and forgeMavenPassword in your ~/.gradle/gradle.properties file, set the value accordingly in the gradle.properties of the project
Step 5: Configure the project from Gradle with our SDK
- Inside the Gradle section, open the app build.gradle file (the one named build.gradle(Module: app))
- Add the SDK with the appropriate version to the dependencies section:
compile "com.connecthings.adtag:android-adtag-beacon:2.5.6"
Step 6: Configure the SDK inside the ApplicationQuickStart class
The AdtagInitializer
- Open the ApplicationQuickStart class
- Configure AdtagInitializer with the information your received from Connecthings inside the onCreate method.
      AdtagInitializer.initInstance(this)
                      .initUrlType(UrlType.DEMO / UrlType.PRE_PROD / UrlType.PROD)
                      .initUser("YOUR_USER",  "YOUR_PWD")
                      .initCompany("YOUR_COMPANY_KEY");
Note:
The AdtagInitializer permits to configure the access to the various Adtag platform. Connecthings gives you access to three platforms :
- The Demo platform is ideal for the technical Proof of Concept (POC) phase
- The Pre-production platform is ideal for the beta versions
- The Production platform is used when you're ready to publish your application
Warning:
Connecthings sent you two different access keys for each platform:
- An access key to sign in to the Adtag Platform
- An access key to use with the SDK mobile, called API_KEY. Be sure to use the API_KEY (login, password, and platform) to connect the SDK to the correct Adtag Platform, otherwise the application won't detect the beacons.
The AdtagLogManager
- In the same method, after AdtagInitializer statement, initiate the AdtagLogManager
AdtagLogsManager.initInstance(this, Network.ALL, 200, 1000 * 60 * 2);
Note:
The AdtagLogManager permits to send the logs generate from the SDK to the Adtag Platform. Logs could be sent :
- over all kind of network or only when the device is connected in WIFI
- in batch of various size
- every xx milliseconds
The AdtagBeaconManager
- In the same method, the AdtagLogManager statement, initiate the AdtagBeaconManager with the UUID received from Connecthings
AdtagBeaconManager beaconManager = AdtagBeaconManager.initInstance(this, "YOUR UUID");
- finally authorize the SDK to access to the bluetooth functions:
beaconManager.saveBleAccessAuthorize(true);
Note:
The AdtagBeaconManager manages the various beacon settings, in particular the UUID on which to filter the beacons.
Step 7: Configure the manifest
- Open the AndroidManifest.xml file inside the manifests folder
- Add to the application tag, the name of the customized application class
<application
    android:allowBackup="true"
    android:icon="@mipmap/ic_launcher"
    android:label="@string/app_name"
    android:supportsRtl="true"
    android:theme="@style/AppTheme"
    android:name=".ApplicationQuickStart" >
</application>
Step 8 : Test the configuration
- Check that your Android Device is in Developer Mode
- Connect your Android Device to your computer
- Activate your beacon
- In Android Studio, click on "Play" to launch the installation process on your phone.
![]()
- On Android 6 and above, when the application starts, a popup asks for permission to access your phone location: grant it!
Tip:
This popup appears because of the FragmentLocationPermision class declared in the activity_main.xml file.
You can learn more reading the managing location permission tutorial
-
Once the application is running:
- if you see "BACKEND_SUCCESS, 1 beacon(s) detected, 1 content(s) attached to the beacon in the Adtag Platform", this means your SDK and your beacon are correctly configured. You can go to the next step.
- If you see "BACKEND_SUCCESS, 0 beacon(s) detected, O content(s) attached to the beacon in the Adtag Platform", check that you correctly activate your beacon and you configure the SDK with the correct UUID
- If you see "BACKEND_SUCCESS, 1 beacon(s) detected, O content(s) attached to the beacon in the Adtag Platform", that means your beacon is not registered into the Adtag Platform or no content has been attached. You can learn how to attach content to beacon reading the Updating the content on the Adtag platform tutorial
- If you see "BACKEND_ERROR, 1 beacon(s) detected, O content(s) attached to the beacon in the Adtag Platform", check the credential and company you use to intialize the SDK.
-
Before going to the next step, stop the beacon emission, and wait untill you see "0 beacon(s) detected".
Tip:
There are 2 solutions to stop the emission process:
- You can put the beacon inside a microwave (but don't start it!)
- You can remove the battery from the beacon (in that case, depending on the model, it can take up to 30 seconds for the beacon to start emitting again when you put the battery back)
Step 9: Generate your first beacon notification
If your beacon is already emitting, you must stop/restart the emission process in order to simulate a new region entry for the smartphone, and generate a notification.
-
Put the application in the background
-
Remove the beacon from the microwave or put the battery back.
-
Wait for a few seconds (maximum 1 minute) - A notification appears
Note:
On some phones with Android 6 and above, it is necessary to enable location on the phone to enable beacon detection when the application is in the background.